The L curl is one of the most unusual and expressive in a lash artist’s palette. You can’t call it universal, but in the right hands it can visually transform the gaze, bring out character, and even “stretch” tricky eye shapes.
It’s fun to work with, but you have to account for how it’s built. In this article we’ll cover how the L curl differs from other curls, who it suits, how it affects wear, and what to watch for when placing fans and classic lashes.

Who does the L curl suit?
The L curl isn’t for everyone, but matched to the eye shape well, the result can be very expressive and even corrective. It’s especially good in tricky cases where other curls get lost or highlight flaws.
Narrow (hooded, slit-like) eyes → the L curl visually opens and lifts the eye, creating more space. A drooping lid → it adds lift and “opens up” the gaze. Clients in glasses → thanks to the sharp, straight bend, the lashes catch the lenses less. Almond eyes → a great playground for experiments; every curl suits them, L included.
When you shouldn’t use the L curl
Natural lashes with a strong downward angle. Here the L curl’s bend adds too much density at the base, which visually weighs the gaze down. Instead of lightness and clarity you can get a “hooded” look and a harsh lash line.
Clients with kinks in the lash line. On lashes like that, placing an L curl precisely and evenly is harder, especially in volume.
Why is the L curl so popular with advanced artists?
It lasts longer. The straight base creates a larger contact area with the natural lash, which strengthens the bond. On average, L-curl wear can be 1 to 1.5 weeks longer, especially in classic.
It works for any effect. Doll, cat eye, squirrel, all of it is doable with this curl. The key is to adapt your lengths correctly and watch your direction. And the winged effect is essentially built with the L curl in the first place.
It looks striking. The gaze comes out sharp, open, and “dramatic.” Especially on eyes that “hide” due to anatomy, the L curl gives lift and a visual focal point.
What’s tricky about the L curl
Yes, it’s striking. But it’s harder to work with than the usual curls. Here’s why:
1. A different grab point. Because of its straight base and sharp bend, the L curl needs a different tweezer position. It’s especially noticeable in volume: you’ll need to grab the fan closer to the bend to keep control of placement. Fans are easier to make off the strip than by hand.
2. Classic in the L curl is a skills test. Because of the crisp geometry, any error in direction shows instantly. If your direction “dances,” it shows, especially in the light. So classic with an L curl is the perfect test of a steady hand and a good eye.
Building fans in the L curl: what matters in volume
Making fans is its own science with this curl. The main points:
The grab. The longer the L curl’s base, the closer to the bend you need to grab the fan. That matters so the base stays rigid; otherwise the fan loses its shape during placement.
Base length. On classic curls, a long closed base can visually weigh the work down; it rises from the horizontal plane into the vertical and becomes visible from the side.
But with the L curl it’s different: the straight base sits in the horizontal plane and “hides” from view. Even a long closed base doesn’t spoil the look, which gives you a bit more freedom in building fans, especially in volume.
The takeaway
The L curl is a powerful tool in the hands of a confident artist. It can open the gaze, correct anatomical features, and give a client that WOW effect. But it also demands precision, an understanding of geometry, and patience.
Here’s what to remember: it suits hooded/slit eyes, drooping lids, almond shapes, and clients in glasses. It lasts longer thanks to the flat base. It requires changing your technique: grab, placement, direction control. It’s best on “calm” natural lashes without a strong downward angle. And it’s a great skills test, especially in classic. Once you master it, the L curl becomes your signature.
Want your photos to sell your work without a word? See also:
You might also like
 How to Match Colored Lashes to Eye Color
 The Ombre Lash Technique and Shadow Effect
 The Wet Look Lash Effect
 Relative vs. Absolute Humidity
 Why You Can (and Should) Get Lash Extensions Wet
 Adaptive Lash Extensions: What They Really Are
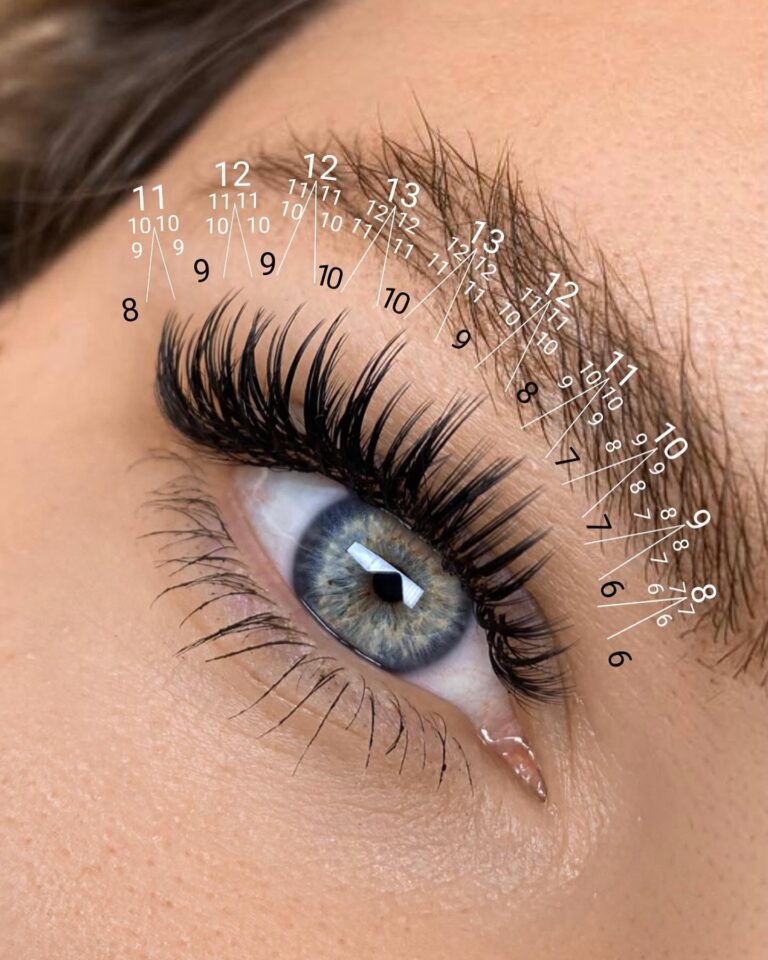 The Mascara Effect in Lash Extensions
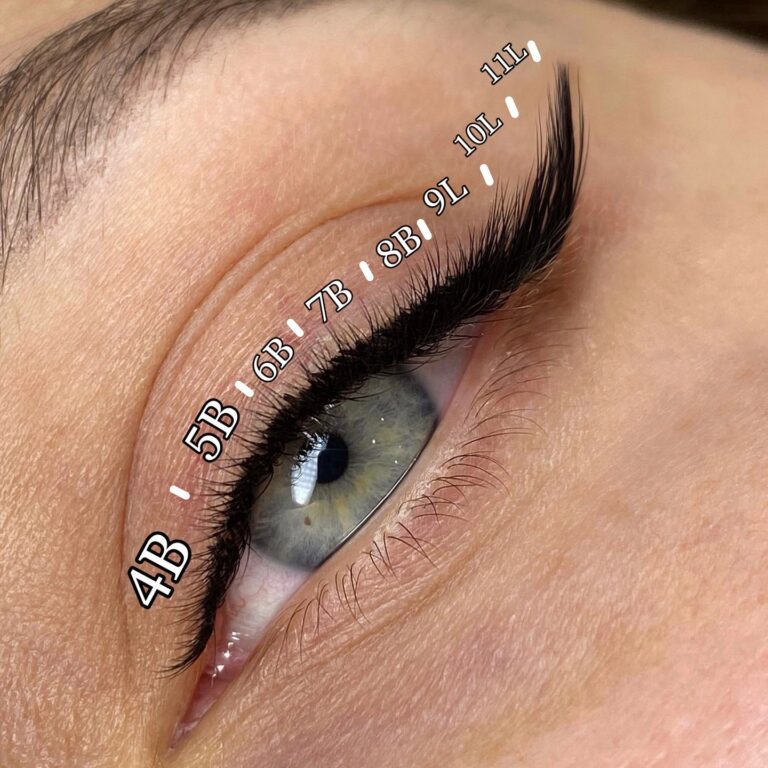 The Top 5 Trending Lash Effects (With Maps)
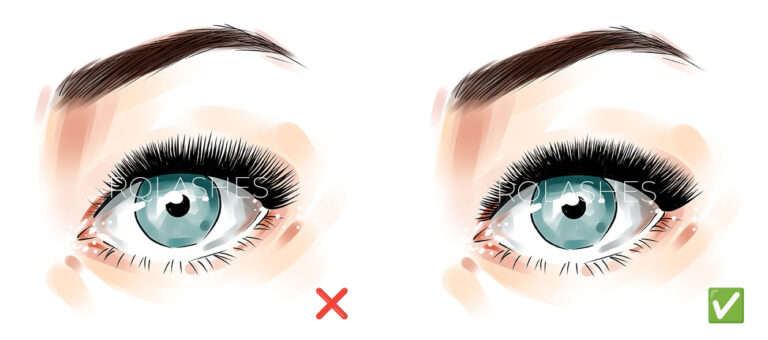 Working the Inner and Outer Corners
 Working With Lash Adhesive in Winter
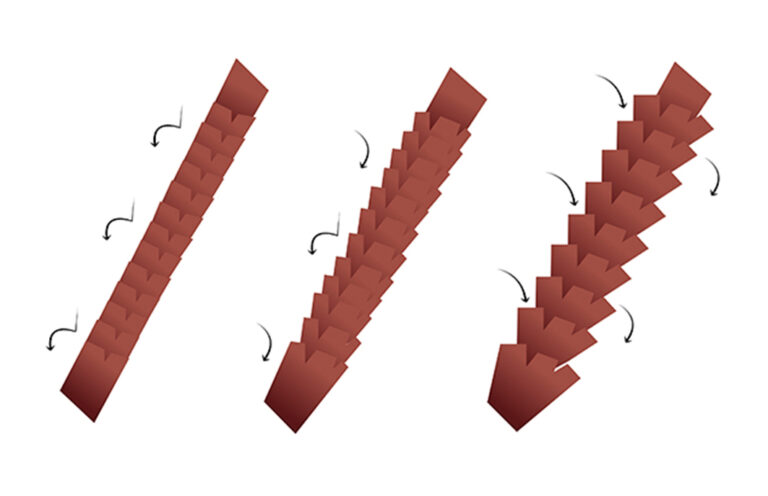 Lash Porosity and How It Affects Retention
 Trending Effects: Anime, Kim, Kylie, Angel
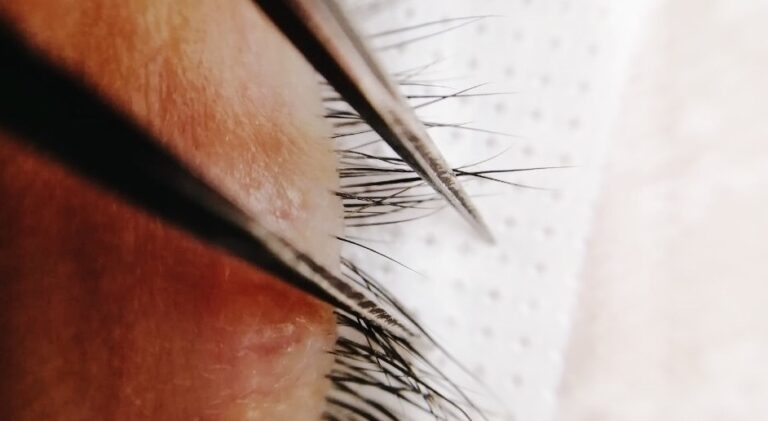 How to Work With Baby Lashes (Anagen Stage)
 Competition Lash Looks
 Is Hypoallergenic Lash Adhesive a Marketing Myth?
 Bottom Lash Extensions
 LED Lash Extensions: The Method, Pros, and Cons
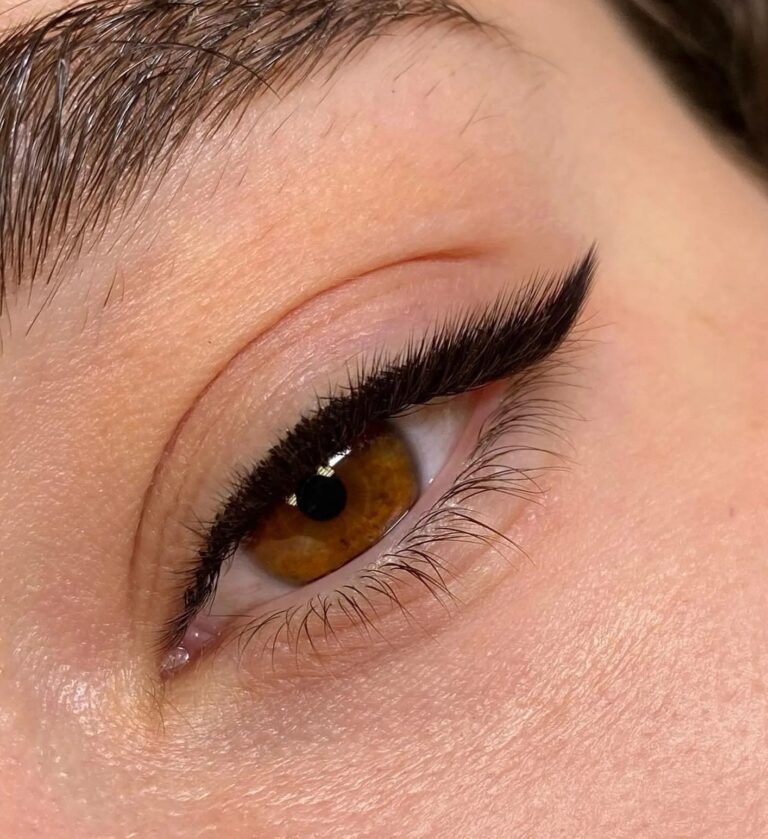 The Winged Eyeliner Lash Effect
 Colored and Creative Lash Extensions
 “I Swear I Washed Them!” What to Do When Clients Ignore Aftercare
 Summer Lashing: How to Tame Your Adhesive in the Heat
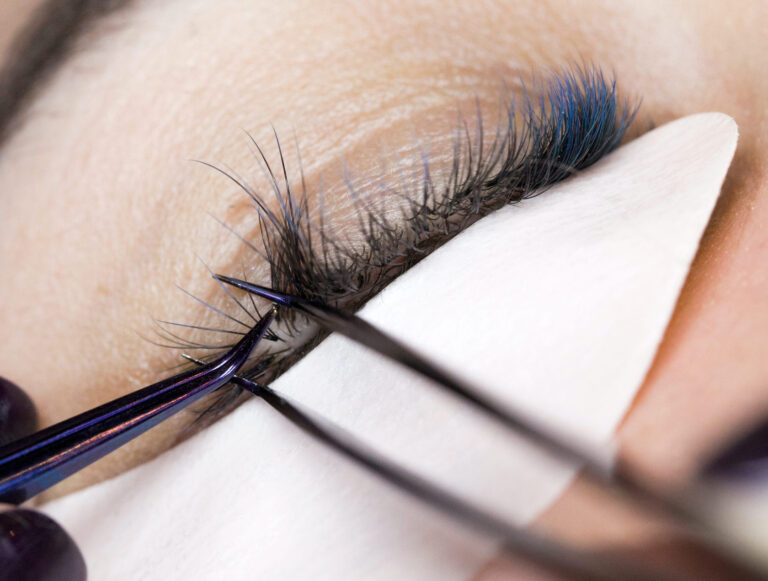 Room Microclimate: The Ideal Temperature and Humidity for Lashing